


Resume
Measuring a laser beam profile is more complex than it may seem. Determining the M² beam quality factor relies on a standardized method, but reliable results also depend on the experimental setup. Source stability, power attenuation, detector selection, and background noise can all influence the measurement. This article explains the main factors to consider when characterizing a laser beam to obtain reliable and comparable results.
At first glance, a laser beam may appear to be nothing more than a simple point of light. However, when it is used for welding, cutting, telecommunications, medicine, or scientific research, its optical quality becomes an essential parameter. Even a slight degradation of the beam can reduce the performance of an entire system.
This is why engineers carefully characterize laser beams before they are used.
Some of the most important parameters include beam size, divergence, focal position, and the M² beam quality factor. M² indicates how closely a real beam approaches an ideal laser beam.
The measurement may appear straightforward. In practice, however, it depends on a series of experimental conditions that must be carefully controlled.
A Standardized Method for Tracking Beam Evolution
To ensure that results can be compared from one laboratory to another, the international ISO 11146 standard defines a reference method.
The principle is relatively simple.
A focal point, known as the waist, is first created using a lens. The beam diameter is then measured at several positions along its propagation axis.
These measurements make it possible to reconstruct the complete shape of the beam. A mathematical fit can then be used to determine several characteristics:
- the M² beam quality factor;
- the minimum beam diameter;
- divergence;
- the exact focal position;
- the Rayleigh length.
The Rayleigh length describes the region where the beam remains most concentrated. It corresponds to the distance between the waist and the point where the cross-sectional area of the beam has doubled.
But measuring the beam at only a few arbitrary positions is not enough.
To obtain reliable results, the standard recommends taking at least about ten measurements over a distance covering several Rayleigh lengths. Approximately half of these measurements should be taken within the Rayleigh length.
The software can then perform the calculations. The quality of the result, however, still depends on how the data were acquired.
The Real Challenge: Everything That Can Distort the Measurement
In practice, measuring a laser beam is far from trivial.
Source stability is one of the first critical factors. If laser power fluctuates during the measurement, the results can quickly become less accurate. Variations in beam pointing can also influence the acquisition.
The optical setup must therefore be mechanically very rigid and minimize vibration as much as possible. The optical path should also be kept as short as possible.
The type of laser must also be considered.
Some fiber lasers, for example, may contain residual pump power. If this power is not properly filtered, it can influence the measurement.
In other words, even when the calculation method is well defined, the result can be affected before the data ever reach the software.
Reducing Power Without Distorting the Beam
Power presents another important challenge.
Beam analyzers generally cannot directly receive several hundred watts, or even several kilowatts. The power must therefore be significantly attenuated before it reaches the camera.
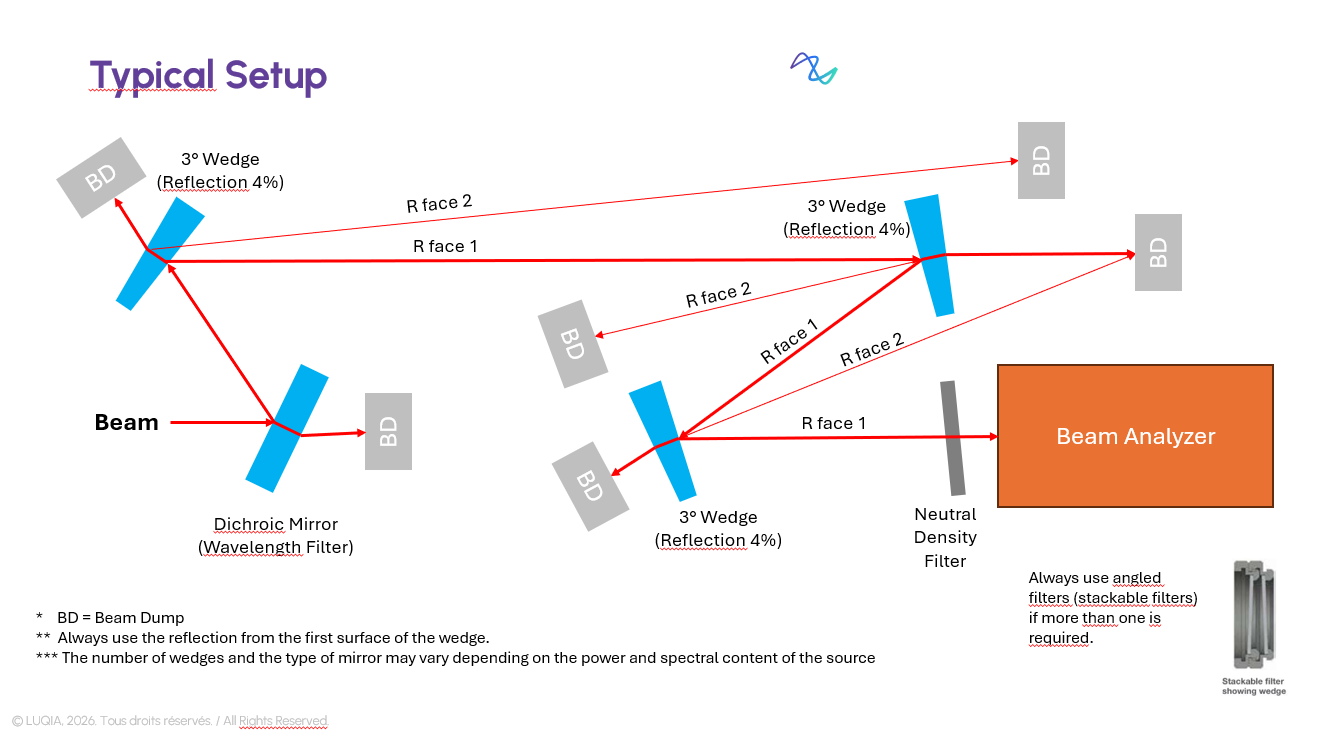
Fig 1: Typical setup for beam measurements
The simplest approach is to use neutral-density filters.
However, this method has a limitation. When the filters absorb too much energy, they can heat up and behave like small lenses.
This phenomenon, known as thermal lensing, can artificially shift the focal position and change the beam size.
The attenuation method itself can therefore distort the very measurement it is intended to enable.
To reduce this problem, specialists often use a combination of wedges, or slightly angled optical plates, and optical filters.
The wedges reflect only a small fraction of the power. The remaining power continues toward an absorber. This configuration significantly reduces thermal effects.
The question is therefore not only how to reduce the power enough for the measurement system. It is also how to do so without modifying the beam characteristics being observed.
Camera Selection Also Influences the Measurement
The sensor used to observe the beam also directly affects the quality of the results.
For many years, CCD cameras were the reference. Modern CMOS sensors now offer several characteristics:
- better resolution due to smaller pixels;
- independent readout of each pixel;
- reduced saturation effects;
- better performance when the wavelength approaches the sensitivity limit of silicon.
These advances make it possible to obtain more precise measurements, particularly near the focus, where the beam is very narrow.
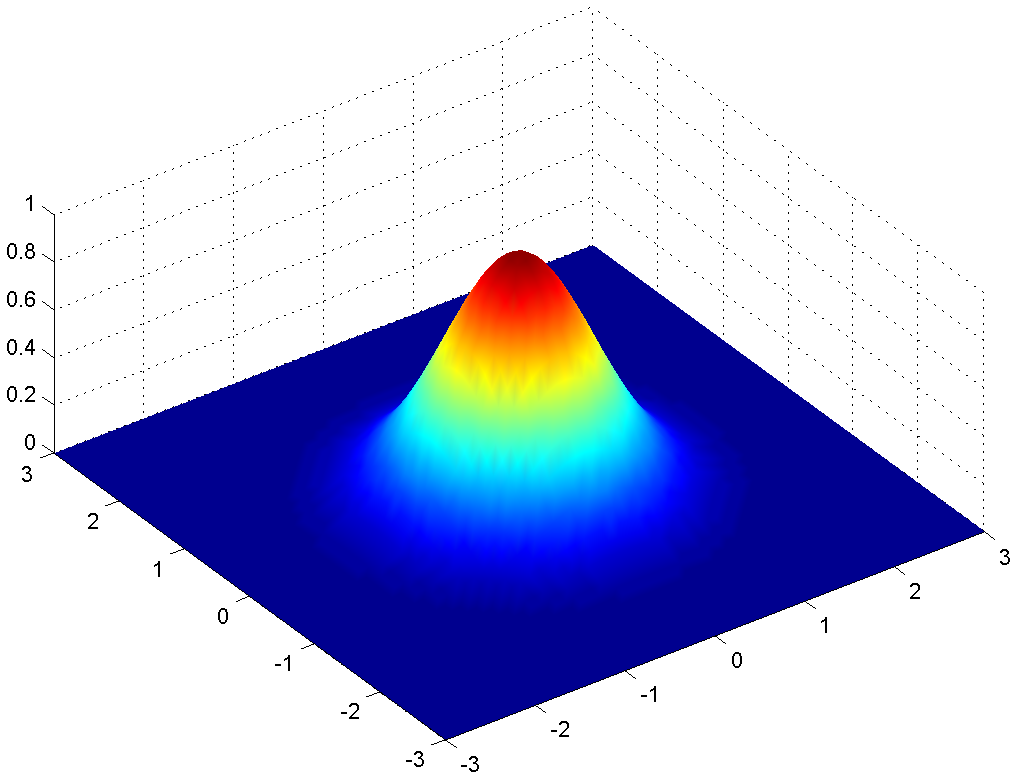
Figure 2: 3D representation of a Gaussian beam profile
Detector selection is therefore more than a minor detail of the setup. Like source stability and the attenuation method, it is one of the factors that directly influence the measurement.
Background Noise: A Subtle Source of Error
Even when the setup appears to be correctly installed, another element can degrade the results: camera background noise.
Modern software automatically compensates for this noise. However, this correction remains essential.
Without it, determining the beam diameter using the D4σ method can be biased. That error can then affect the other calculated parameters.
A measurement that appears correct at first glance can therefore still be influenced by an effect that is not immediately visible in the experimental setup.
Software Simplifies the Calculation, Not the Experiment
Today’s software makes M² measurement much more accessible. In just a few clicks, it can automatically calculate the M² factor and generate test reports.
But it cannot correct a poor experimental setup.
The choice of optical components, their alignment, the method used to attenuate the power, mechanical stability, and detector quality all remain critical.
This is where much of the complexity of laser beam profile measurement lies.
The calculation can be automated. The quality of the measurement still depends on the conditions under which the data were acquired.
Measuring a Laser Beam Requires More Than a Camera
Measuring laser beam quality therefore involves much more than placing a camera in front of a light source.
The method requires tracking how the beam evolves, distributing the measurement points appropriately, and controlling the different effects that can influence the result. Source stability, power attenuation, detector selection, and background noise all play a role.
Careful control of the experimental setup, combined with standardized measurement procedures, is what makes reliable and comparable results possible.
To discuss implementing this type of measurement in your laboratory, contact our technical team.
